Blood and Sand
Betrayer of the Horadrim is the sixth Act II quest and takes the player below Caldeum and up out into the Dahlgur Oasis for the first time.
Quest Information[edit | edit source]

- Initiated by: Zoltun Kulle
- Pre-requisite: Betrayer of the Horadrim
- Required to progress? Yes
- Reward(s): Gold/ Experience
- Lore items: Hunter's Journal, The Desert Aqueducts, Deceivers' Orders, On the Desolate Sands, Crumbling Journal and The Promises of Fezuul al-Kazaar
- Related Achievements: Big Trouble in Talking Barrel
- Leads to: The Black Soulstone
Blood and Sand Walkthrough[edit | edit source]
Take the waypoint from the Hidden Camp to the Dahlgur Oasis. The exit from the Oasis to the Waterway is at the very top of the map. As you exit the area you'll run into Ssthrass, a superunique Deceiver. He'll raise some Doom Vipers as you fight.
Once you reach the waterway Kulle will appear and say, "I can open this gate for you.". Once in the Ancient Waterway Emperor Hakan II will appear and give you instructions to pull a couple of flow control levers. Head through the doorway to the Western Channel.
Look out for the Hunter's Journal when you get down there which is required for the Eavesdropper achievement. There will also be a satchel down here containing part 1 of The Desert Aqueducts required for the Historian of Caldeum achievement.
This is a uneventful level where you will face perhaps one rare monster. Other than that standard Fallen, Accursed, Vile Swarm and Skeletons, that type of fare.

Locate the exit to the Eastern Flow Control where, again, you'll find a lever you need to pull which opens a stairway back down to the Ancient Waterway where you saw Emperor Hakan II which now has an exit to the Waterlogged Passage.

You can check under your achievements (Y) Challenges > Act II to double check you have heard all his chit-chat before freeing him.
Once it is broken, he will accompany you to the Hidden Aqueducts, where you help him find the Crucible, an item that allows him to combine fragments of jewels. You'll come across his 'assistant-gone-bad', Gavin the Thief. A human with the Plagued attack. He's pretty easy to take down. Once he's dead collect the Crucible. Covetous will now return to the Hidden Camp to join your Caravan.
You head out to the Ancient Path which is a tiny area that leads to the Desolate Sands. Look out for Traveler's Pouches on the ground as they contain entries of On the Desolate Sands required for the Historian of Caldeum achievement. Also look for Envoy of Belial corpses as they will contain entries to Deceivers' Orders required for the Eavesdropper achievement. You might come across some skeletal remains on the east perimeter of the level which will yield the Crumbling Journal required for the Judge of Character achievement.
Pick up Kulle's blood from two sections, the Vault of the Assassin and the Cave of the Betrayer level 2. After that, you go to town, talk to Adria, and proceed on the Black Soulstone quest.
Vault - Cains Lost Satchel, Judge of Characer
Objectives in Brief[edit | edit source]
|
|
|
* Checkpoint reached around this stage in the quest. This means you can quit out and Resume your game at a later date and begin at this point - in effect it's a Save Game point.
Associated Achievements[edit | edit source]
Blood and Sand is in some way involved in the following achievement(s).
| Name | Points | Description | Banner |
|---|
Gallery[edit | edit source]

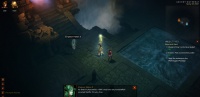
Entrance to the Ancient Waterway
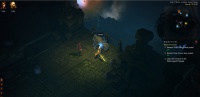
Emperor Hakan II greets you

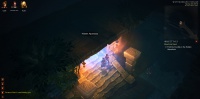
Western Channel attack
Western Flow Control Lever

Eastern Channel rare attack

Eastern Flow Control Lever

Entrance to Waterlogged Passage
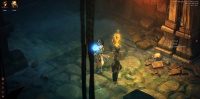
Covetous freed in the Waterlogged Passage
Entrance to Hidden Aqueducts

The Crucible for Covetous


| Quests & Events of Diablo III [e] Act I Act II Act III & Act IV Act V |
|---|